Showing posts with label Appetizers. Show all posts

October 20, 2014

Chicken Seekh Kabab

Seekh kababs are the most popular type of kababs (atleast to my knowledge). I have tasted mutton seekh kababs before in some Indian restaurants but where I live, we get minced chicken very easily and so I thought I will try making seekh kababs using minced chicken.

One can surely try making lamb/mutton seekh kabab but the cooking time may vary as mutton/lamb take long time to cook. The chicken kababs were very juicy and tender and we finished all of it in few minutes. Let me know if you like the taste of it!


Ingredients:

Minced Chkn - 1LB
Onion - 1/2, finely chopped and sauteed
Cilantro - handful, finely chopped
Green Chillies - 1 small, finey chopped
Dhania Powder - 2 1/2 tspn
Garam Masala - 2 tspn
Red Chilli Powder - 1 tspn
Ginger - Garlic Paste - 1 tspn
Mint Leaves - 1 - 2 tspns, finely chopped
Bread Crumbs - 2 - 3 tbspns
Salt-  as per taste

Oil for frying (if not baking/broiling)

Procedure:

1.       Mix all ingredients given above, other than oil. Check to see if the mixture is thick enough and can hold up a sheek kabab shape (Cylindrical). If it doesn't, then add some more bread crumbs to it till it becomes easy to shape.
2.       Now make cylindrical shaped kababs by either rolling them around the skewers (make sure wooden skewers are soaked in water for atleast 30mins before using them) and bake/shallow fry in a pan for 10-12mins or until done (or broil for 5mins on each side).
3.       I did not use any skewers but just shaped them in cylindrical shape and shallow fried them in a pan with 1 tspn oil. I also BBQed these kababs and they turned out awesome!
4.       Serve/Eat this with mint chutney mixed in greek yogurt and some sliced onions with lemon squeezed on top. YUMMMM!!!!


Conclusion:
I made these for my hubby's Bday BBQ and I got rave reviews for them. It got over in no time!


May 14, 2014

Baked Asparagus Fries

My 2nd post for Earth Day... I am excited to write and publish this!

I went to Costco few days ago and bought a big bag of Asparagus and then I came across these baked Asparagus Fries pic on Pinterest. I knew immediately what I am going to do with my big bag of Asparagus. I didn't have breadcrumbs on me so I made it myself. But they turned out nice and crunchy! I didn't expect it to be so simple to make and so yummy to taste.

I served it with Spicy Sriracha Dip!


Ingredients: 
Asparagus Spears - 15-18
Bread Crumbs - 1 cup
Egg, beaten - 1
All Purpose Flour - 1/2 cup
Red Chilli Powder - 1 tspns
Salt

Procedure: 
1. Preheat oven on 350 F
2. Mix salt and red chilli powder in breadcrumbs
3. Dip Asparagus spears in flour, then in egg wash and then in breadcrumbs. Repeat this process for all the spears and bake on a cookie sheet for 12-15mins

Variations: 
You can make this recipe with some variations like adding spices to the crumbs

Conclusion:
Crunchy Asparagus Fries dipped in Spicy Sriracha sauce tastes really great. This simple recipe goes with all kind of food.

February 5, 2014

Cajun Shrimp Quesadilla

These days I prefer to try some quick entrees as it will be useful for my blog readers to try them out and also for me when my baby is cranky and doesn't let me cook ;). Although he is a calm baby with very little sleep, he gets bored easily if there is no one to entertain him.
Shrimp quesadilla is one of the quick and easy entrees to try out. You can experiment a lot with the ingredients and try to make as per your palate.


Ingredients: 
Medium Soft Tacos - 4
Peeled and deveined Shrimp - 12-15 medium sized
Red/Yellow/Green Bell Pepper - 1
Onion -1 medium
Sour Cream - 2 tbspn
Store bought salsa - 3 tbspn
Mexican Blend Cheese - 1 pack
Cajun Spice - 2 tspn
Salt & Pepper as per taste
Oil

Procedure: 
  1. Cut the shrimp into small pieces and marinate it with the cajun spice and some salt.
  2. In the meantime, sautee the onions and bell peppers till they are soft and add salt and pepper as per taste.
  3. Now sautee the shrimp till just cooked (make sure it's not chewy)
  4. Mix sour cream and salsa and mix it well and keep aside
  5. Heat a pan and put a soft taco on it and keep the heat to low. Now sprinkle some cheese on one half of the taco and add the sauteed onions, peppers, shrimp, sour cream and salsa mixture on the same half side of the taco. Now sprinkle some more cheese on top and cover the taco with the other half and heat the other side till cheese melts. 
  6. Serve the hot and spicy quesadilla with homemade Guacamole. 


Variations:
You can add any other meat instead of the shrimp or go veggie by completely omitting the meat. I liked the veggie creation as well which I made for my mom.

Conclusion:
Happy tummies and in future baby will be happy too.

July 15, 2012

Lemon Mushroom Risotto with Scallops

It's been a record now! I have not contributed towards my blog for the past 4 months and I feel sorry about it. I do not have enough excuse for this blunder but yeah I was busy giving exams (Yes, I cleared my PMP certification - deserve a pat on the back), roaming with parents and in-laws and getting pampered :). But yes, how could I forget about my baby (my blog) just because I am going to have a baby!?! So here is my latest creation :)
My husband and I are fans of Hell's Kitchen and inspired by Gordon Ramsay's Risotto I wanted to make Risotto too. I had tried once before and loved it. I didn't blog about it then and so I thought why not try it once again so that I can give correct measurements.


Although I would like to warn you about couple of things before making risotto:
1. It takes a lot of time and patience to make Risotto. Even though many websites and cook books say 25-30 minutes as cooking time, it takes at least 45 minutes (stirring constantly)
2. It is fattening - so if you are a health freak like me, just workout 1-2 hours more in the week but please do not try to reduce the amount of butter from the recipe (as I have already done so. Any less than this wouldn't taste good - tried that too)

I found this recipe behind the rice packet that I bought and I added my own taste to it to make it lime n lemony.

Ingredients: 
Arborio rice - 1.5 cups
Vegetable/chicken broth - 6 cups
White wine - 1/4 cup (optional)
Mushrooms, sliced - 2 cups
Onions, chopped - 1 medium
Garlic, minced - 3 cloves
Parsley, chopped - 2 tspn
Parmesan Cheese - 3 tbspn
Butter - 4 tbspn
Lemon Juice - 3 tbspn


Procedure: 
  1. Keep the broth on the stove on medium heat till it boils.
  2. In the mean time, saute mushrooms in 1 tbspn till soft and keep it aside to cool. 
  3. Now saute the onions and garlic in the rest of the butter till translucent. Then add the rice to the onion-garlic mixture. Mix it well for a minute or so.
  4. On medium heat, add the white wine and stir it till the wine is absorbed by the rice. In similar fashion, start adding 1/2 cup broth at a time and cook till all the broth is absorbed by the rice, stirring occasionally so that the rice doesn't stick.to the bottom. 
  5. Repeat the above step till the rice is cooked al dente. Personally, I like it cooked a little more than al dente.
  6. Now, add the mushroom, Parmesan cheese, lemon juice and parsley, mix well and serve with scallops.

Variations: 
You can modify this recipe in many ways - get rid of lemon, add herbs etc.

Conclusion:
The Mushroom Lemon Risotto with Cajun scallops turned out really yummy. Even the baby was dancing with happiness :)

October 18, 2011

Sausage Stuffed Mushroom


I wanted to use the sausages I had at home and so I thought of making stuffed mushrooms as I was really bored of eating hot dogs Hollywood and Highland style. However stuffed you are, you cannot miss the hot dog stand at Hollywood and Highland. The lady sells them on the streets for $4 with some grilled onions and peppers. I am a big fan of that and so I tried replicating it at home, it was good but it was missing the "grease" :-)
So when it's my husband's turn to cook (which comes once in 2 months), he takes the easy route and makes the HH Hot Dog (or Pasta). He really puts loads of efforts in making it (even if he can cook in half the time and effort :-P). Coming back to the topic of stuffed mushrooms, I really wanted to try them as I had seen a very similar recipe on foodnetwork.com (by Rachael Ray). I had seen the ingredients in it but when I really wanted to make it, I never found the recipe :(. So I just winged it and it turned out really yummy.

Ingredients: 
Mushrooms (normal sized) - 1 pack
Herb Flavor Sausage - 1
Onions, finely chopped - 1 (medium)
Bell Peppers, finely chopped - 1/2
Garlic, minced - 2 pods
Cream Cheese - 3tbspn
Basil - 7-8 leaves
Cheese for Garnish - 2tbspn
Egg yolk - 1

Procedure: 
  1. Wash and clean the mushrooms and remove the stem and chop them fine.
  2. Sautee the mushrooms (not the stems) with their heads up so that the water is drained out. Switch off the heat and let them be in the pan for 3-6 mins so that all water from mushrooms is drained.
  3. Now sautee the finely chopped onions, mushroom stems, garlic and bell peppers till they are cooked (8-10mins)
  4. In the mean time, pre-heat the oven at 325 degrees. Remove the casing off the sausage and separate the meat. Cook this meat with the onions for another 3-4 mins.
  5. Let this mixture cool.
  6. Now mix egg yolk and cream cheese and then add the cooked mixture and mix well. 
  7. Fill the mushrooms with the mixture and bake for 12-15mins on 325 degrees.
Variations: 
For vegetarians, it can be converted into a vegetarian dish by adding paneer/cottage cheese with some Parmesan cheese instead of the sausage.


Conclusion:
I served this with Alfred-Pesto Pasta. Every single bite of it was delicious. It is very heavy and filling so this recipe would hold 3-4 servings as a side dish. This is a very good appetizer for potlucks and game nights.

Butter Paneer Naanizza / Indian Style Pizza

I usually try to make things out of what I have in the inventory and/or what is perishable. So I had half of store-bought Paneer Packet left and some Naans. I remembered the Butter Paneer Pizza I had in San Jose when I went for a very good friend's Birthday Party. We had surprised her by visiting her all the way from Los Angeles.
Her Fiancee had organized the Birthday Party for her and had ordered Butter Paneer Pizza. It was sooo good that it got over in a few minutes.
So I thought I would try to make something similar with the ingredients I had.

Ingredients (for 4 people):
Paneer, pea sized cubes - 2 cups
Green Bell Peppers, 2" sliced - 1
Onions, sliced - 1
Ginger-Garlic Paste - 1tspn (Optional)
Tandoori masala - 2Tbspn
Chicken Curry Powder - 1Tbspn
Red Chilli Powder - 1 tspn
Kasuri Methi - 1tspn (Optional)
Butter - 2Tbspn
Ketchup - 6-7 tbspn
Naan - 6
Mozzarella Cheese, shredded - 3 cups


Procedure: 
  1. Pre-heat oven on 350 degrees.
  2. Add Butter to pan and saute onions, bell peppers and ginger garlic paste for 2mins (Do not cook it). Then add Paneer and other ingredients and sautee for another 2mins. 
  3. Spread ketchup on the Naan and distribute the mixture on the Naan evenly and sprinkle cheese on top
  4. Now place the Naans in the oven for 8-12mins or till cheese has melted.
Variations: 
You can add chicken instead of Paneer. In that case, use cooked chicken breasts for best results.


Conclusion:
I was astonished with the results. They were yummy and were made in 20mins only.

June 28, 2011

Spicy Chicken Satay

LA has plenty of Asians and Asian restaurants. I love Thai food (who doesn't, duh!?) and I love cooking so I thought I will try making some Thai curry/Fried Rice/Chicken Satay. Yessss... Chicken Satay with Spicy Peanut Sauce and Thai Pineapple Shrimp Fried Rice, it is!

Ingredients: 
Chicken thigh pieces (Bonelesss) - 1.5LB
Yogurt - 1tspn
Ginger root - 1 inch
Turmeric - 1/2 tspn
Curry Powder - 1.5tspn
Coriander Powder - 1/2 tspn
Lemon Grass - 1 stalk
Fish Sauce - 1tspn
Garlic - 2 cloves
Chilli Pwder - 1 tspn
Soy Sauce - 1tspn
Salt to taste
Bamboo Skewers - 8-10


Procedure: 
Grind all the ingredients (other than chicken and bamboo skewers) together and marinate the chicken for atleast 2 hours. Now soak the skewers in water for 1 hour so that they don't burn.
Now thread the marinated chicken pieces on the skewers and grill it for 4-7 minutes each side. Use some oil to baste it.
Serve it with Spicy Peanut Sauce.


Variations: 
You can add coconut milk instead of the yogurt.


Conclusion:
Yummy chicken satay - just like the ones you get at Thai restaurants.

March 10, 2011

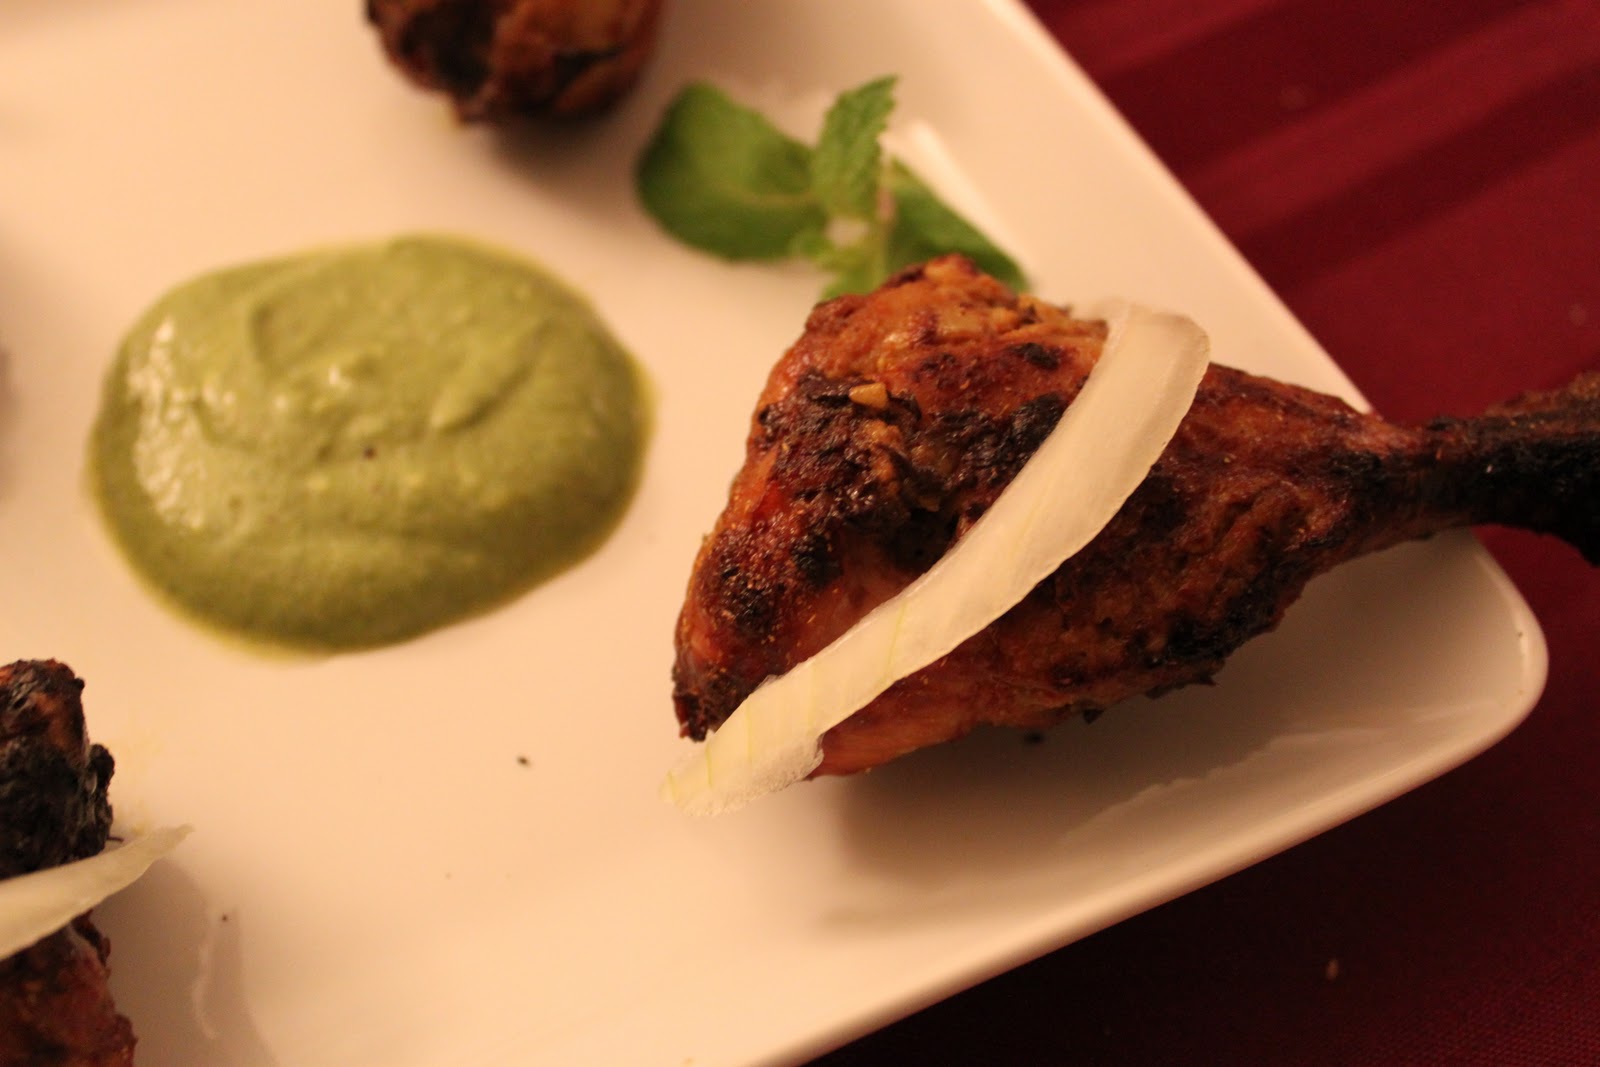
Tandoori Chicken


'Tandoor' is a special type of clay oven which uses wood or charcoal as a fuel. The tandoor ovens are bell-shaped and was used to make naan in earlier days. It is used in various countries to cook and bake.
The tandoor is used for cooking variety of Afghan, Iranian, Pakistani and Indian food.
The taste of the chicken is enhanced by the Tandoor oven. I always disliked people eating the chicken leg the way they usually eat - holding the bone and pulling the meat off! But when I tried the same thing, I loved it. I became a great fan of chicken tandoori. We had BBQ parties in our apartment complex once in a while (Organized by my Husband and I) and the attractions were Chicken Tandoori and Mojitos!!

Ingredients: 
Chicken Legs - 6 pieces
Yogurt - 1 tbspn
Tandoori Masala - 2 tbspn
Chicken Curry Masala - 1 tbspn
Ginger - Garlic Paste - 1 tbspn
Lime Juice - 1tbspn
Mint - 2 sprigs
Cilantro - 3 sprigs
Green Chilli - 1
Red Chilli Powder - 1 tspn
Salt

Procedure: 
  1. Clean the chicken by removing the skin and fat. Make 3-4 slits in the leg pieces so that the marinade penetrates deep inside.
  2. Make a paste of green chilli, mint and cilantro.
  3. Now mix all the ingredients and make a paste of it and cover chicken legs in it.
  4. Keep the marinated chicken for 4-6 hours or overnight.
  5. I do not have a grill, so I used a broiler which gives a great result too! I use the charcoal grill during the BBQ parties in my complex.
  6. Heat the oven/broiler on HIGH heat and place the chicken in it for 15 mins and then turn them over and cook it for another 10-15mins. 
  7. The chicken is done when a fork pricked in, enters easily in the chicken.
  8. Relish the tandoori chicken with green chutney, chaat masala and lime juice.
Variations: 
You can use coconut milk instead of yogurt or not use yogurt at all. You can use your cooking skills and enhance the taste according to your taste buds.

Conclusion:
A hit BBQ party in which I taught everyone to make Mojitos and grill the chicken.

February 17, 2011

Tandoori Paneer Tikka

When I was a child, my family rarely visited the restaurants. We did not have a 'Once-in-a-week' restaurant schedule like other families. But when we went, we always ordered a sabzi with Paneer and daal for sure (Ithink that is what an average Indian family orders). My dad never liked the Paneer Sabzis  but was a big fan of the Tandoor Paneer Tikka. So I thought I should give it a try and impress my dad when he visits me next in US.

Ingredients:
Paneer - 500 gms/1 LB
Yogurt - 2 tbspn
Chaat masala - 1 tbspn
Tandoor Masala - 2 tbspn (Available in Indian Stores)
Lime Juice - 4 tbspn
Ginger-Garlic Paste - 1 tbspn
Red Chilli Powder - 1 tspn
Onions - 1 large (Cut into cubes)
Bell Peppers - 2 medium sized (Cut into cubes)\
Salt

Method of Preparation:
  1. Cut the Paneer in larger cubes. Make sure they are a little larger so that they dont break when you put them in the skewers.
  2. Mix the ginger-garlic paste, red chilli powder, tandoor masala, 1 tbspn lime juice, salt and yogurt together.
  3. Add in the paneer, onions and peppers to it and marinate it for atleast 2 hours.
  4. Now arrange the paneer, onions and  bell peppers on the skewers in an order
  5. Place the skewers on an aluminium foil in the broiler (on High) for 5-7 minutes each side. Do not overcook it or the paneer will become chewy.
  6. Remove from broiler and sprinkle chaat masala and some lemon juice on it and relish it with mint chutney.
Variations:
You can also add 1 tbspn of chicken curry powder to the marinade to get a different taste.
You can spread some Mint Chutney on a Tortilla and make a wrap of the Tandoori Paneer Tikka you just made!

Conclusion:
My dad is in India, so he couldn't try it but for now my husband tasted it and really loved it. Hopefully you all love it too!