September 18, 2011

Shrimp Jambalaya

I am writing this as I am making the shrimp Jambalaya. This dish came to my mind thinking of the leftovers I had at home and I had marinated Cajun Chicken which was lying in the fridge for tonight's dinner. So to accompany the Cajun Chicken, I thought of making Shrimp Jambalaya (as I had shrimp in the freezer and no sausage or boneless chicken).
We eat this dish very often at The Farmer's Market. The name of the stall is The Gumbo Pot. First of all, I never knew what the difference in Jambalaya and Gumbo was. So I googled and found out that both the dishes belong to New Orleans (Southern Amrica) and both are spicy. The difference is with rice and without. Jambalaya has rice (lot of it!) and Gumbo doesn't! Jambalaya is a little thick, but Gumbo is soup-like with Oakra in it to give it a nice texture (although I do not like slimy Oakra).


Ingredients: 
Onion, chopped - 1/2
Tomato, chopped - 1/2
Bell Pepper, chopped - 1/2
Garlic - 2pods
Cayenne - 1/2tspn
Cajun Spice - 2 tspn
Oregano - 1/2tspn
Parsley Flakes - 1/4 tspn
Rice - 1/3 cup
Chicken Broth - 2 cups
Shrimp, peeled and deveined - 2 cups
Oil
Salt to taste

Procedure: 
  1. Heat some oil in a pot and saute onions, bell peppers and garlic for 4-5mins.
  2. Now add all other ingredients except for chicken broth and shrimp.
  3. Saute for another 2mins and add chicken broth to it and cook it (with lid on) for 35-40mins or till rice is cooked and desired consistency is achieved, on low heat.
  4. Now add some salt and shrimp and cook it for 2 mins more. South American flavors are lingering in my kitchen!
Variations: 
You can vary Jambalaya as you want. Add some chicken pieces to it, throw in some sausages and other veggies. It will still taste GREAT!


Conclusion:
I cooked it but had it the day after. The flavors had soaked in well. We relished it with Grilled Cajun Chicken....yummy!

August 27, 2011

Indian Cupcakes / Sheera / Sooji ka Halwa


We were planning to visit my husband's cousin in San Diego, CA and wanted to make something for her. I had prepared Masala Dosa Batter and chutney and was going to make the sabzi (potato curry) at her place. To make it a complete meal, I wanted to take some sweet dish and I could think of 2 types of sheera: One is Ravyacha Sheera/ Sooji ka Halwa (Sapat - that's what the konkanis call it) and second was Pithacha Sheera/Aatte ka Halwa, which my mother used to make with loads of love and ghee. I ended up making Ravyacha Sheera/Sooji Ka Halwa  as I wanted to use the banana I had and Pithacha sheera would have been an experiment ( I have never made it before but I have seen my mother make it) on her and her family which comprises of herself, her husband and a cute lil dog (Sammy).

The best part of our short visit to San Diego was the Gourmet Food Truck Festival at Del Mar. It had 30-35 gourmet food trucks - Right from Naan-Stop to 'Cupcake Wars' Winner Corner Cupcakes. There were huge lines for every food truck but we still managed to get some awesome food without a loooong wait. We had some attractive Potato Tornadoes which made people stop and ask us what exactly it was(that is what even I did). We also did some crazy photo session as if I was drowning in beer glass.
Potato Tornadoes (Cajun Style held by Ram and I am holding the Sweet Potato Style)  were the 
head-turners

HEEEEELP!!! I am drowning (read enjoying) in a glass full of beer!
Ingredients: 
Rava/Sooji/Semolina - 1 cup
Ghee/Indian Butter - 5tbspn
Milk - 1 cup
Water - 1cup
Sugar - 3/4cups
Cardamom/Elaichi, Powdered- 4 pods
Cashews, chopped - 1/3 cup
Raisins - 1 Tbspn
Ripe Banana - 1

Procedure: 

  1. In a pan, roast the rava/sooji, cashews and raisins for 3-5mins on medium heat, stirring constantly. Make sure you don't over-roast it and make it brown.
  2. At the same time, boil the water and milk together on med heat.
  3. Now slowly pour the boiling water+milk mixture over the roasted rava stirring it simultaneously. Make sure no lumps are formed.
  4. Now add the sugar, mashed ripe banana and the ghee and mix it well and shut it with the lid. Let it cook for 4-5mins on med-low heat.
  5. Lastly, add the elaichi powder and mix it and serve warm or cold.


Variations: 
Remember that the Rava : (Milk+Water) proportion has to be 1:2. So you can vary it to make more water less milk or vice versa (I prefer it more milk and less water).
Also, you can roast cashews and raisins separately in butter and then add it to sheera after step # 3.

Conclusion:
It was very yummy, low in sugar (as everyone prefers less sugar now a days) and super moist Sheera. Even Sammy enjoyed a small morsel :).

August 16, 2011

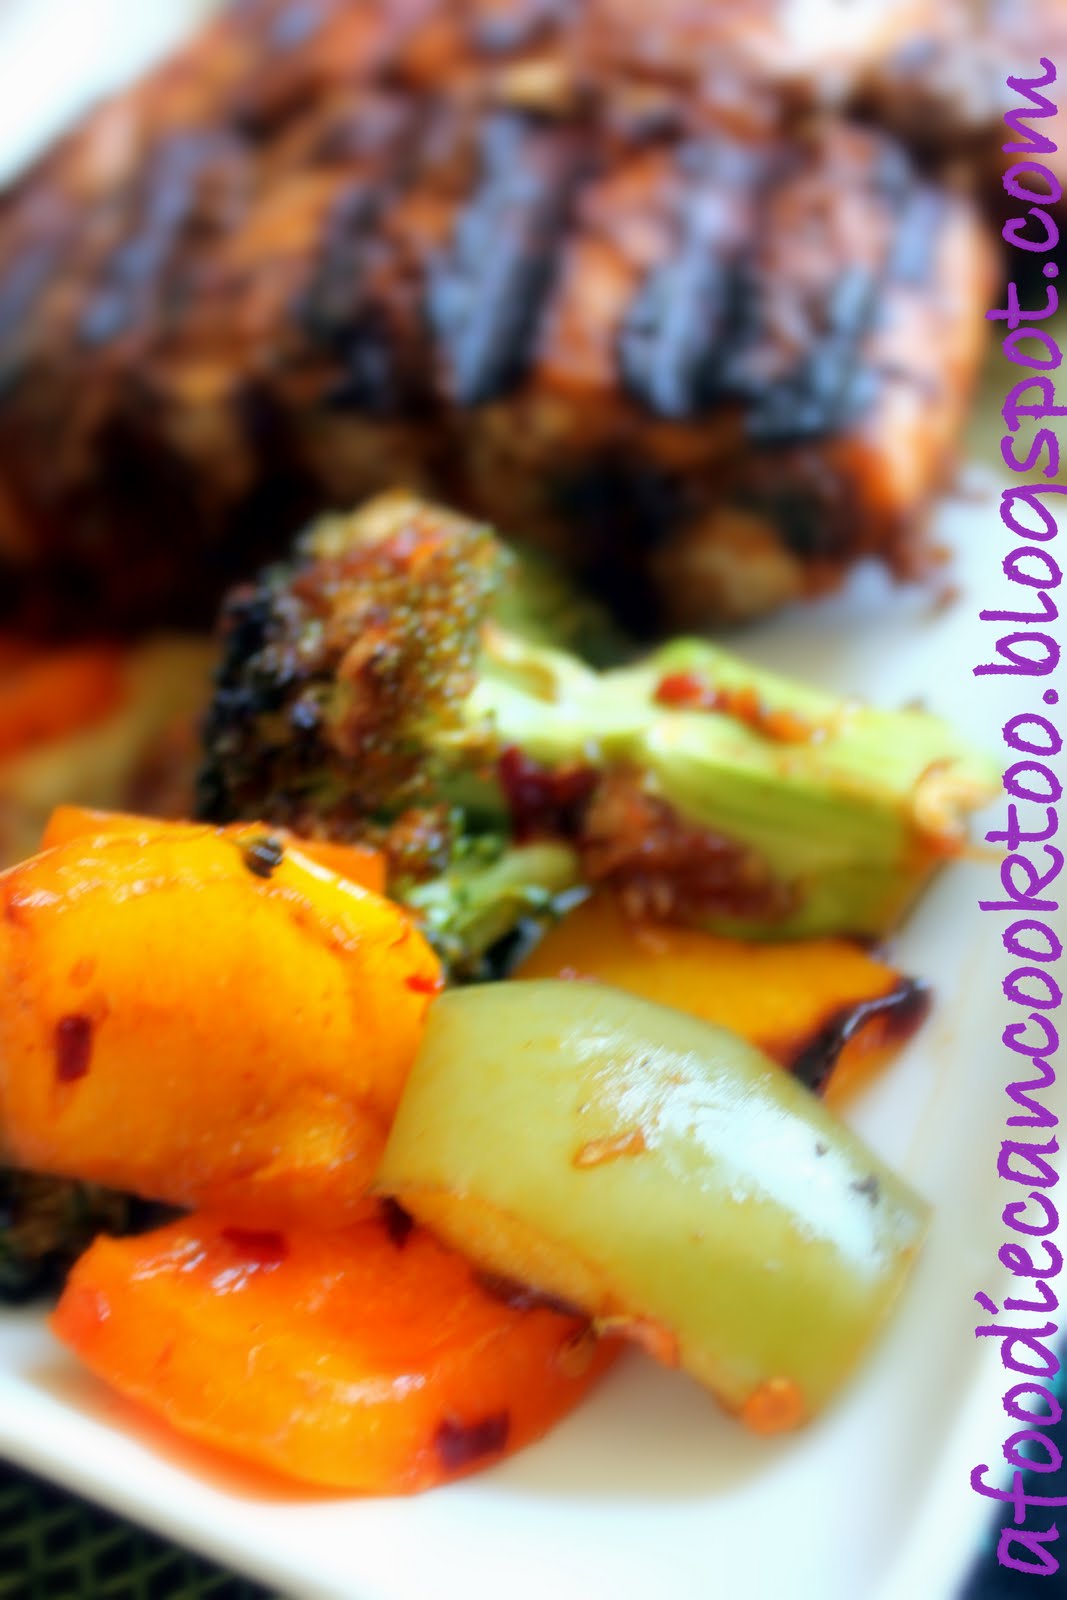
Cajun Style Grilled Salmon/Blackened Salmon with Seasoned Grilled Vegetables

I love it when the grocery store near my house has some discounts/sale going on on herbs and spices. On one of such occasions, I bought Cajun Spice to try out Cajun Shrimp.
Now a days Husband dearest has become 'Carb Conscious' and so wants to eat less of Carbs and more of the proteins. Salmon has zero carbs and higher levels of Omega-3 fats (considered as good fat). So we eat a lot of seafood or meat with less carbs and starch & nuts like walnut, almond, hazelnut etc.

Ingredients: 
Salmon - 4 fillets


For Marinade
Cajun Spice - 3Tbspn
Red Chilli Powder - 1 tspn
Garlic, minced - 3 cloves
Olive Oil - 1 Tbspn
Water - 2Tbspn
Salt

Grilled Vegetable with Stir Fry Sauce
Broccoli florets - 2 cups
Bell Peppers, 1" cubes - 2 cups
Mushroom - 1cup
Garlic, minced - 1tspn
Ginger, finely chopped - 1tspn
Ketchup - 1Tbspn
Marsala Wine (Optional) - 2Tbspn
Soy - 1Tbspn
Red Chilli Flakes - 2Tbspn
Salt & Pepper

Procedure: 
Mix all the ingredients for marinade and coat the salmon fillet with it and keep aside. Now mix all the ingredients for Vegetable stir fry and put it on the grill. Once they are grilled, put the salmon fillets on the grill and grill for 8-10 mins on each side or till the salmon is cooked.
Serve the salmon with the grilled vegetables stir fry and / or rice.


Variations: 
This dish can be varied as per the taste else it is just too good! Try the Shrimp Jambalaya with it, if you think this is not enough!


Conclusion:
Low Carb diet was devoured in minutes.

Serves: 2 - 3
Total Time - 30 mins

Paneer Tikka Panini

Cafe Coffee Day was the all time hang out place for me and my friends. I loved the Tropical Iceberg there. I remember having this Paneer Tikka Panini there and OMG, it was very yummy. But I did not have enough motivation and a kitchen to try it out (I used to live in a hostel in Navi Mumbai where I had an electric hot plate to warm milk and make khichdi). I still remember the taste of that panini and I had everything handy, so I decided to try it out on a Tuesday morning (7am) for my lunch box.

Ingredients: 
For Stuffing
Paneer/Cottage Cheese, small cubes - 1 cup
Bell Peppers, 1" cubed - 1 cup
Onions, 1" cubed - 1 cup
Tandoori Masala - 2 Tbspn
Red Chilli Powder - 1tspn
Ginger-Garlic Paste - 1/3 tspn
Coriander Powder - 1 tspn
Yogurt - 1 Tbspn
Salt

For Panini
Bread Slices - 4
Mint Chutney (optional)
Butter to spread on the bread
Cheese, grated - 1 cup (I used 4 cheese blend as it was handy)


Procedure: 
Mix all the ingredients for stuffing and keep aside. Now spread some mint chutney on the bread slices on one side and butter on the other. Heat a pan and add the stuffing mixture to it. Cook it for 5-8mins or till paneer is tender and onions and bell peppers are crisp. Evenly distribute this stuffing to the bread slices with butter side being out and mint chutney on the inside. Now sprinkle some cheese on the stuffing and grill the sandwich till the bread turns golden brown.
Serve this with some ketchup or mint chutney.

Serves - 1 person


Variations: 
Make it a kids favorite by using less masalas and adding more cheese to it. They would definitely love it!

Conclusion:
It tasted just like the Cafe Coffee Day's Paneer Tikka Panini. How I wish I could pay a visit to India to see my Family and friends and hang out at CCD :)

August 7, 2011

Intense Chocolate Truffle Cake (Gluten Free)

It's been a while I have tried my hand at baking as I don't get many opportunities and time to bake. This weekend I had some time on hand and it was a friend's birthday who has twin babies (4 months old). So I thought of celebrating her birthday at (her) home by taking some food and baking a cake for her. I had to make a decadent chocolate truffle cake knowing that she would like Sugarless cake.
I always try to substitute things I have at home instead of buying something just for the recipe as it saves me time and $$. So I decided to use 4 types of chocolates (which I had at home) - semi-sweet, 60% dark, milk and white chocolate - and it turned out yummilicious! This cake/truffle was a good contender for restaurant style dessert for which I pay $$$. I hope you try making it and love it just like my friend and her family did (couldn't feed the twins as they are very young :( ).

Note: Please use a good quality chocolate for a great experience and restaurant style taste. Enjoy!!!

Ingredients (for 6-8 servings):
For Truffle 
Butter - 1/2 cup
Semi-Sweet Chocolate Chips - 1cup
60% Dark Chocolate Chips - 2/3cup
Large Eggs, chilled - 4

For Ganache
Heavy Cream - 1/4cup
Any Chocolate Chips - 1/2 cup (I used Dark and Milk)
Corn Syrup - 1Tbspn (This is used for getting a glaze to the ganache, so it is optional)

Garnish:
Milk Chocolate Bar, for curls - 1
White Chocolate Bar, for shaves - 1


Procedure: 

  1. Melt the chocolate chips and butter (Truffle ingredients) on a double boiler till they are smooth. Let it sit aside and cool.
  2. In the mean time, pre-heat the oven on 350 degrees and then whip the eggs on medium speed for 5-7mins.
  3. Now fold the whipped egg (1/4th portion at a time) in the chocolate mixture and mix till it just assimilates.
  4. Now grease a cake pan and line it with parchment paper (optional). Pour the batter in the greased pan
  5. Prepare a water bath for the cake by filling a large pan (larger than the one used for cake) with hot water (hot tap water can be used) and then placing the cake pan in the water bath. Make sure the water is half way up the sides of the pan.
  6. Bake it for 50mins or till the cake is done. When it is done, cool it on a rack (do not remove it from the pan) and then wrap it with plastic wrap and refrigerate it overnight. The next day (or after 7-8 hour) remove the cake from the pan, dip the pan in warm water halfway up the sides and then run a knife around the inside of the pan and then invert it on a plate.
  7. Prepare the ganache the next day. Boil the heavy cream and then melt the chocolate chips in it (heat it if need be) till they are smooth. Add the corn syrup and mix well. When the ganache is slightly warm, pour it over the cake to make it look like it is oozing out or you can use an offset spatula to make it look nice and clean.
  8. Now use a peeler to make some curls out of the chilled chocolate bar and grate some white chocolate bar over the cake. Play around with the decoration and have fun!
Ganache Poured Over the Chocolate Truffle
The end result. Just Love the glaze over the ganache!

Variations: 
You can use sugar free chocolate bars to make sugar free truffle.
Also, if you don't find chocolate chips, don't get disappointed, you can use chocolate bars and chop them or use a peeler to make curls and use them instead.


Conclusion:
A very decadent and rich chocolate truffle is ready to be devoured :). Dark chocolate contains a large number of anti-oxidants which protects from aging. Also, the eggs are a good supplement of protein. So enjoy the dessert you just made.

July 27, 2011

Orange Chicken Salad - Revealing Secrets

An Irish proverb says "A good laugh and a long sleep are the best cures in the doctor's book" but I would correct it to "A good laugh, a healthy diet, a long walk and a long sleep are the best cures in the doctor's book." We need not keep on worrying about our health all the time because that is more dangerous than eating unhealthy food. One must enjoy the good health they have rather than worrying about it.


Eating right and eating at the right time is the trick. 
You need not eat salad everyday to be healthy, you need not starve to reduce your weight, you need not eat bad tasting food to be on diet! All you need to do is, eat right and eat at the right time.


Know what you eat.
To eat right, you must know what you are eating. So wear your apron and get started in the kitchen. You can start with small things at a time. Even if you eat out, make sure you know the ingredients and opt for healthy choices like wheat bread instead of white, grilled chicken instead of fried chicken etc.


Refresh your mind and body.
Exercise refreshes your mind and body. Just 30-60mins of exercise/day is enough for a healthy mind and body. It doesn't matter if you walk to the grocery store or you run on a treadmill in the gym. The important thing is to exercise and be happy. 


Don't Be a Couch Potato.
Go out, make some friends, eat out, drink some beer, go for a comedy show but remember to exercise and stay worry-free. 

Ingredients (1 serving): 
Raw Items:
Spring Mix - 1/8 LB
Red and Orange Bell Pepper - 1/2 cup
Garbanzo Beans, canned/cooked - 1/2 cup
Mandarines - 1/2 cup
Toasted Sesame - 1/2 tspn
Chicken Tenders - 1/2LB

Dressing:
Soy Sauce - 3Tbspn
Lime Juice - 2Tbspn
Extra Virgin Olive Oil - 2Tbspn
Brown Sugar - 2tbspn
Black Pepper Powder - 1/4 tspn
Salt - a pinch full
Garlic, minced - 1tspn
Oil/Butter for frying garlic
Orange Juice - 1/8 cup

Procedure:
  1. Mix all the ingredients for dressing other than garlic and oil for frying.
  2. Now, heat a small pan and add oil to it. Fry garlic till they are golden and add to the above mentioned dressing mixture.
  3. Now grill/broil/cook the chicken tender with some salt and pepper 
  4. Add 1/2 of the prepared dressing to the chicken and let it sit aside.
  5. Add orange juice to the remaining 1/2 of the dressing and mix it well.
  6. Now mix all the raw ingredients and put the orange dressing on top of it. Add the chicken on top and garnish with some toasted sesame.
Variations: 
It can be made veg by taking off the chicken and adding Tofu/Soy chunks.


Conclusion:
Today I got up early so that I can pack this for lunch and blog about it in the spare time. I am going for Dodger's baseball game tonight (just to hog on the garlic fries and chug some beer as I do not understand the game :) ). So I am compensating for all the junk food I will be eating tonight with the salad.

July 19, 2011

Stuffed Chicken Marsala

I think of Olive Garden whenever I think of Chicken Marsala. I wanted to try making something new and different - I was bored with Indian cooking and eating- and Olive Garden is pretty far from my place. Guess what?!? I decided to make Chicken Marsala at home and got Marsala Wine and chicken breasts from Farmer's Market (which is my favorite place - If you have a Farmer's market nearby, I would recommend you to buy fresh produce from there to help the local farmers and to eat better quality food).
After I came home from Farmer's Market, I asked my husband, "What is the stuffing made up of in Stuffed Chicken Marsala at Olive Garden (because he orders that every time)?" He said, "Cheese, Breadcrumbs and some seasoning." I decided to make Stuffed Chicken Marsala instead of just Chicken Marsala! It takes a long time for the marsala wine to cook, but its worth all the effort at a very low cost and then writing (boasting) about it on your blog!! :D

Cooked Stuffed Chicken
Stuffed Chicken Marsala Ready to be Devoured
Ingredients: 
Stuffing - 
Parmesan Cheese - 1/2 cup
Shredded Pepper Jack - 1/2 cup
Any other Cheese (I used 4 cheese blend) - 1/3 cup
Bread crumbs - 1/2 cup
Sour Cream/Yogurt - 3 Tbspn
Cream Cheese - 2Tbspn
Sal - as per taste
Pepper - 1/2tspn
Garlic - 1Tbspn
Oregano/Italian Herb - 1/2 tspn
Cajun Seasoning (Optional) - 1tspn
Crushed Red Pepper - 1tspn


Chicken:
Boneless Skinless Chicken Breast - 3 pieces, halved and pounded
All Purpose Flour - 1/2 cup
Sal & Pepper - to season the flour
Butter - 2tbspn

Sauce:
Marsala Wine - 2.5 cups
Heavy Cream - 1/2 pint or 8ounces
Mushrooms (I used  Portabella), sliced - 4cups
 Onion - 1/2 cup, finley chopped
Garlic - 1/2 tspn, finely chopped

Procedure: 
  1. Mix all the ingredients for the stuffing and keep it aside.
  2. Mix all purpose flour with salt and pepper and keep it aside.
  3.  Take a heated pot and add some butter and onions and garlic to it.
  4. After onions turn translucent, add sliced mushrooms to it. Now add the marsala wine and let it boil for 15-20mins on medium heat. 
  5. In the meantime, take pounded chicken pieces and evenly distribute the stuffing on one piece and put another halved chicken piece on top of it.
Stuffed Raw Chicken
  1. Put some butter on a heated pan and add some garlic to it.
  2. Now coat the stuffed chicken pieces on both sides with the flour mixture and place it on the heated pan. Cook it on both sides till it turns light brown, adding butter whenever needed.
  3. Now place the chicken pieces in a pre-heated oven for 10-15mins at 250degrees F.
  4. By now the marsala wine must have been reduced to half of what it was. Now add the heavy cream and let it all boil on low heat till all the sauce is reduced to half/desired consistency.
  5. When the desired consistency is achieved and chicken is done in the oven, pour the sauce and mushrooms over the chicken pieces and it serve it with some baguette and wine. You can also serve mashed potatoes with it.
Variations: 
If you want to use a non-alcoholic substitute for marsala, I would suggest using grape juice, although I am not too sure if it will taste the same. You can also substitute the heavy cream with half n half in case you don't have it handy.


Conclusion:
Happy tummy and happy wallet and not to mention happy husband :)