October 20, 2014

Chicken Seekh Kabab

Seekh kababs are the most popular type of kababs (atleast to my knowledge). I have tasted mutton seekh kababs before in some Indian restaurants but where I live, we get minced chicken very easily and so I thought I will try making seekh kababs using minced chicken.

One can surely try making lamb/mutton seekh kabab but the cooking time may vary as mutton/lamb take long time to cook. The chicken kababs were very juicy and tender and we finished all of it in few minutes. Let me know if you like the taste of it!


Ingredients:

Minced Chkn - 1LB
Onion - 1/2, finely chopped and sauteed
Cilantro - handful, finely chopped
Green Chillies - 1 small, finey chopped
Dhania Powder - 2 1/2 tspn
Garam Masala - 2 tspn
Red Chilli Powder - 1 tspn
Ginger - Garlic Paste - 1 tspn
Mint Leaves - 1 - 2 tspns, finely chopped
Bread Crumbs - 2 - 3 tbspns
Salt-  as per taste

Oil for frying (if not baking/broiling)

Procedure:

1.       Mix all ingredients given above, other than oil. Check to see if the mixture is thick enough and can hold up a sheek kabab shape (Cylindrical). If it doesn't, then add some more bread crumbs to it till it becomes easy to shape.
2.       Now make cylindrical shaped kababs by either rolling them around the skewers (make sure wooden skewers are soaked in water for atleast 30mins before using them) and bake/shallow fry in a pan for 10-12mins or until done (or broil for 5mins on each side).
3.       I did not use any skewers but just shaped them in cylindrical shape and shallow fried them in a pan with 1 tspn oil. I also BBQed these kababs and they turned out awesome!
4.       Serve/Eat this with mint chutney mixed in greek yogurt and some sliced onions with lemon squeezed on top. YUMMMM!!!!


Conclusion:
I made these for my hubby's Bday BBQ and I got rave reviews for them. It got over in no time!


May 14, 2014

Baked Asparagus Fries

My 2nd post for Earth Day... I am excited to write and publish this!

I went to Costco few days ago and bought a big bag of Asparagus and then I came across these baked Asparagus Fries pic on Pinterest. I knew immediately what I am going to do with my big bag of Asparagus. I didn't have breadcrumbs on me so I made it myself. But they turned out nice and crunchy! I didn't expect it to be so simple to make and so yummy to taste.

I served it with Spicy Sriracha Dip!


Ingredients: 
Asparagus Spears - 15-18
Bread Crumbs - 1 cup
Egg, beaten - 1
All Purpose Flour - 1/2 cup
Red Chilli Powder - 1 tspns
Salt

Procedure: 
1. Preheat oven on 350 F
2. Mix salt and red chilli powder in breadcrumbs
3. Dip Asparagus spears in flour, then in egg wash and then in breadcrumbs. Repeat this process for all the spears and bake on a cookie sheet for 12-15mins

Variations: 
You can make this recipe with some variations like adding spices to the crumbs

Conclusion:
Crunchy Asparagus Fries dipped in Spicy Sriracha sauce tastes really great. This simple recipe goes with all kind of food.

Green Goddess Salad

I keep taking long breaks from updating my blog. This time I blame myself as I was too busy cooking and so did not find (or spare) time to update the blog. I feel really bad about it.

Anyways, now that I am back I have decided to post 3 entries which I experimented for the Earth Day! April 22nd is celebrated as Earth Day and it is very important for us to realize the value of Mother Earth. I recently read about why and how it started on this website. It's history is very interesting.

Lately, I have been on Pinterest a lot. I always thought it would be another social networking site (So dumb of me) but my friend introduced me to it and now I am ADDICTED! This recipe came from one of the Pins I found on Pinterest. The picture looked sooo pretty that I had to make it (and it tasted even better). I made major modifications to the recipe as I did not have a lot of things on hand but I used the similar idea.

Ingredients: 
Quinoa, cooked - 1 cup
Mint Coriander Chutney - 2 tbspns
Pistachio, coarsely chopped - 2 tbspns
Boiled/Cooked Peas - 2 tbspns
Asparagus, chopped - 2 tbspns
Olive Oil - 1 tbspn
Onion - Half cup
Avocado, cubed - 1/2
Salt

Procedure: 
1. Heat Oil in a pan and saute onions on medium flame
2. Once onions are browned, add mint coriander chutney and saute for 2mins. Then add all ingredients other than avocado and pistachio to it and mix well
3. Once cooled, add pistachios and avocado and mix well and serve


Variations: 

The original recipe had called for Basil Pesto instead of Mint Coriander Chutney and I am sure it would taste really yummy with that too.

Conclusion:
Enjoyed the salad a lot as it had variety of textures in it. This Green Goddess Salad was something I would make again and next time I will try when I have Basil Pesto on hand.

March 13, 2014

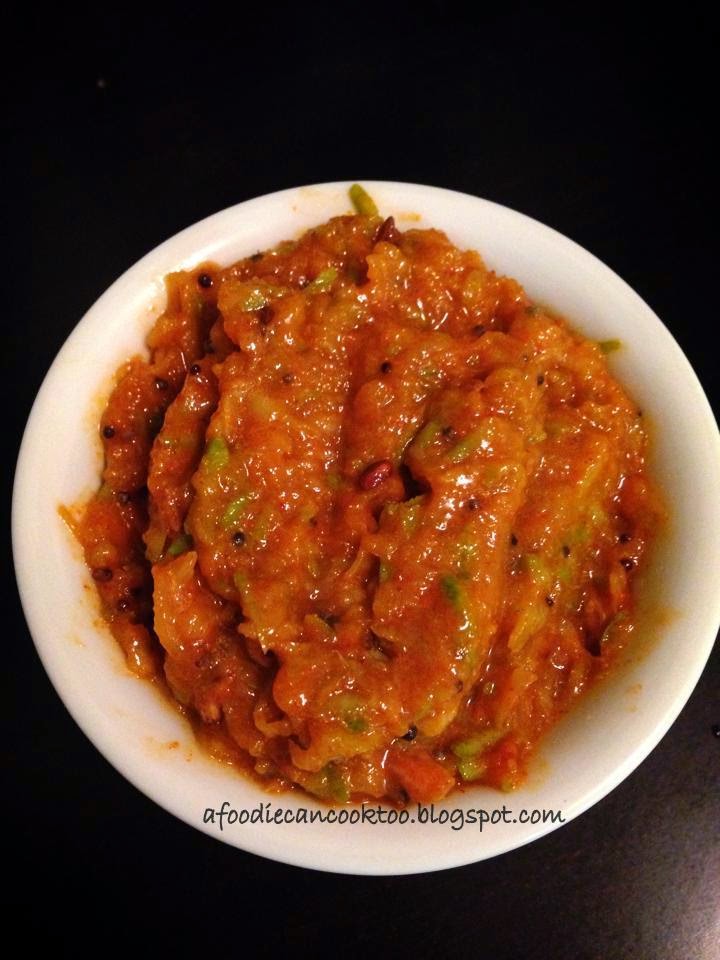
Takku/Raw Mango Pickle

I went to Indian store recently and found raw mango in the veggies section. I bought just one thinking of making onion chutney out of it but then I ended up making 'Takku' - Marathi word . My Maternal Grandma used to make Takku during summer on a large scale as she had to send to all her daughters (3) and daughter-in-laws (6) and other close relatives. I still remember the taste of her takku and this recipe came close to what she used to make.


Let's hope you all try and like it too!

Ingredients: 
Raw Mango, grated - 1 (grate with peel on)
Red Chilli Powder - 3 tspn (depending on how hot the chilli powder is)
Turmeric - 1/4 tspn
Salt
Sugar - 1/2 tspn

Tampering
Oil - 2 tspn
Mustard Seeds - 1/2 tspn
Cumin Seeds - 1/2 tspn
Garlic - 1/2 tspn


Procedure: 
Mix all ingredients given above other than the one for tempering. Heat oil in a small pan and add mustard seeds, cumin seeds and let it crackle. Then add garlic and fry till it is golden brown in color.

Add the tempering to the mixture of raw mango and spices and mix it well and adjust salt/sugar as per your taste.

Variations: 
You can use any other vegetable like carrot, amla, etc. instead of raw mango but trust me raw mango tastes the best.

Conclusion:
Relish the yummiest takku you just made with curd rice or roti sabzi!

March 9, 2014

Chocolate Nutella Mug Cake... Prep, Cook & Devour in just 5 mins!!!

It was a rainy evening and I was craving for Nutella Hot Chocolate but instead I made this really yummy, decadent and super easy cake in a mug which can be made in microwave. It takes only 5 minutes to prep, cook and devour!


My husband and I have sweet tooth and crave for dessert every night. If he doesn't find anything, he eats a chocolate or spoonfull of Nutella. One day I came across this recipe which has both Nutella and chocolate and I have been a big fan of this recipe since then. So I decided to share it with you guys so that you can make this whenever you crave for dessert :). Absolutely decadent and sooo easy to make!

Makes one mug full which can be easily finished between 4 but I would say just share with your loved one ;)

Ingredients: 
All Purpose/Self rising Flour - 4 tbspn
Sugar - 4 tbspn
Unsweetened powder - 2 tbspn
Nutella - 3 tbspn
Egg - 1
Milk - 2 tbspn
Oil - 3 tbspn
Baking Powder - 1/4 tspn (if you are using All Purpose Flour)

Procedure: 
Make sure you have a big coffee mug. Combine all ingredients and mix well. Microwave for 1.5 mins on high power (It varies based on microwave) and that's it!! Serve warm with whipped cream or ice cream.

Note: Make sure you watch it closely while it is cooking in microwave and stop it when it is nicely risen (approximately 1.5mins).


Variations: 
You can distribute it in 3-4 ramekins and cook it for 30-40 secs each. It will serve up as individual dessert cups.

Conclusion:
Really decadent chocolate cake made within minutes and devoured in seconds ;)


March 4, 2014

Sweet Potato Pudding / Ratalyacha Halwa

I fast once a year which is for Mahashivratri. We are followers of Shiva and hence we have big celebrations back home on Mahashivratri. Mom used to make Sabudana khichdi (Savory Sagoo) and Bhagar (varai). Sweet potato was one of my favorite items during fasting. I used to eat it with milk and sugar.

Sweet potato in India are not orange in color, they are yellowish. They are not as sweet as the ones you get here but they are really yummy.

On Mahashivratri, I had invited a friend of mine for dinner and I wanted to make something else other than usual things. So I decided to make 'Ratalyacha Halwa'/ 'Sweet Potato Pudding' and trust me it turned out yummmmy! You must give it a try too even if it is not Mahashivratri.


Ingredients:
Raw Sweet Potato, grated - 1.5 cup
Sweetened Condensed Milk - 4 tbspns
Ghee - 2 tbspns
Elaichi Powder - 1/4 tspn
Nuts (Pistachios, Cashewnuts, Almonds), crushed - 1 tbspn

Procedure:
Heat a pan and add ghee to it and when ghee is heated, add the grated sweet potato to it. Sauté it well until its nicely cooked (10mins maybe). Then add rest of the ingredients and cook for another 5-10mins. or till it is soft and mushy.

Variations:
I would not want to make any variations to this dish. It turned out to be so awesome that I am going to make it again soon.

Conclusion:
It was over in one go. A super hit I must say!

February 5, 2014

Cajun Shrimp Quesadilla

These days I prefer to try some quick entrees as it will be useful for my blog readers to try them out and also for me when my baby is cranky and doesn't let me cook ;). Although he is a calm baby with very little sleep, he gets bored easily if there is no one to entertain him.
Shrimp quesadilla is one of the quick and easy entrees to try out. You can experiment a lot with the ingredients and try to make as per your palate.


Ingredients: 
Medium Soft Tacos - 4
Peeled and deveined Shrimp - 12-15 medium sized
Red/Yellow/Green Bell Pepper - 1
Onion -1 medium
Sour Cream - 2 tbspn
Store bought salsa - 3 tbspn
Mexican Blend Cheese - 1 pack
Cajun Spice - 2 tspn
Salt & Pepper as per taste
Oil

Procedure: 
  1. Cut the shrimp into small pieces and marinate it with the cajun spice and some salt.
  2. In the meantime, sautee the onions and bell peppers till they are soft and add salt and pepper as per taste.
  3. Now sautee the shrimp till just cooked (make sure it's not chewy)
  4. Mix sour cream and salsa and mix it well and keep aside
  5. Heat a pan and put a soft taco on it and keep the heat to low. Now sprinkle some cheese on one half of the taco and add the sauteed onions, peppers, shrimp, sour cream and salsa mixture on the same half side of the taco. Now sprinkle some more cheese on top and cover the taco with the other half and heat the other side till cheese melts. 
  6. Serve the hot and spicy quesadilla with homemade Guacamole. 


Variations:
You can add any other meat instead of the shrimp or go veggie by completely omitting the meat. I liked the veggie creation as well which I made for my mom.

Conclusion:
Happy tummies and in future baby will be happy too.

Pesto Cream Cheese Filled Chicken Roll Ups

After a long long time, I am back to blogging. These days it is so difficult to find time to do anything due to the adorable little darling who is 1 year old already!

We also visited our family and friends in India in Dec 2013. This was Neil's first trip to India and he did pretty well. Everyone enjoyed his company a lot especially Neil's cousins and grand parents.


We had bought a house in India and we got the possession of it, so we did a small Housewarming Ceremony.

All in all, it was a great month long vacation!

Alright, coming to the point - I found the pictures of this dish on Pinterest and just decided I will wing it as per my taste. So I added some cream cheese and pesto and rolled up the chicken. Next I am going to try it with mushrooms stuffed inside and some sauce on top of the chicken. For now, let's enjoy what we have :)

Ingredients: 
Chicken Breast, Pounded - 2
Basil Pesto - 4 tbspns
Cream Cheese - 2 tbspns
Salt
Pepper
Bread Crumbs - 1/2 cup
Toothpicks

Procedure: 
  1. Preheat the oven to 350F
  2. In the mean time, take the pounded chicken breasts and cut each piece into 3 parts lengthwise
  3. Now spread the cheese and then the basil pesto on it. Sprinkle some salt and pepper on top of the pesto and roll the chicken breast like a swiss roll
  4. Now tuck some toothpicks inside the roll to keep it rolled and cover it in breadcrumbs and bake for 35-40 mins (or till chicken is cooked)
  5. Last but not the least, relish every bite of the juicy chicken roll ups with some cajun spiced asparagus and squash.


Variations: 
There are plenty of variations to this recipe. I also added some sauteed asparagus with tomato paste, basil pesto, and mozzarella cheese and rolled it up. It tasted really delicious too!

Conclusion:
Add whatever filling you want, roll it up and roll it into your mouth....yummm!! My mouth is watering now. I better go and have a bite of the leftover chicken roll ups.